【wallpaper教程】web壁纸制作
前言
偶然间竟然发现wallpaper竟然支持网页制作壁纸,当时正苦恼官方的SceneScript没有可以参考的技术文档,就想着可不可以用JavaScript开发。然后就在创意工坊找到”网页“壁纸分类,嘿~这不巧了吗,专业对口啊。
但是官方并没有过多的讲述网页壁纸开发过程中需要注意的,以及一些其他配置相关的信息。因此,本教程将从初始化项目到运行项目来教授wallpaper-web壁纸制作。
正文
其实网页壁纸制作起来很简单,只是一个静态页面就可以了,注意,是一个
技术要求
掌握Html容器的使用、熟练CSS样式制作(包括动画)、熟练JS脚本制作(动态壁纸)
项目结构
网页
基本的网页结构即可,各个文件夹和文件的位置对于项目根目录来说没有硬性要求,但为了良好的编程习惯,建议将对应的文件和文件夹整理成合理的结构
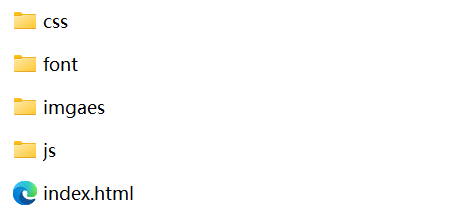
–项目根目录
–css 储存网页的样式文件
–font 字体文件夹
– images 存放页面图片
–js js脚本储存位置
–index.html 壁纸视图(网页首页)
wallpaper(壁纸制作完毕后出现的文件)
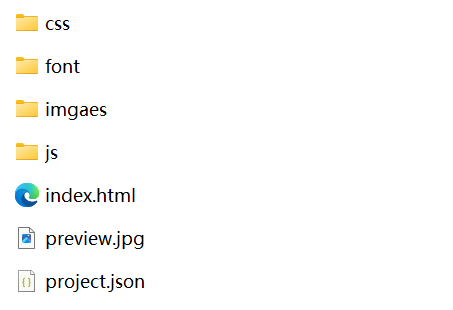
–项目根目录
–css 储存网页的样式文件
–font 字体文件夹
– images 存放页面图片
–js js脚本储存位置
–index.html 壁纸视图(网页首页)
–preview.jpg 壁纸缩略图
–project.json 壁纸配置文件/wallpaper可供用户更改壁纸数据的入口文件
项目初始化
因为网页壁纸本身就是网页,所以可以在浏览器中制作完毕后直接扔到wallpaper中运行即可,但是为了便于开发过程中便于调用wallpaper的一些属性和配置,建议使用”热更新方式“进行制作
导入项目
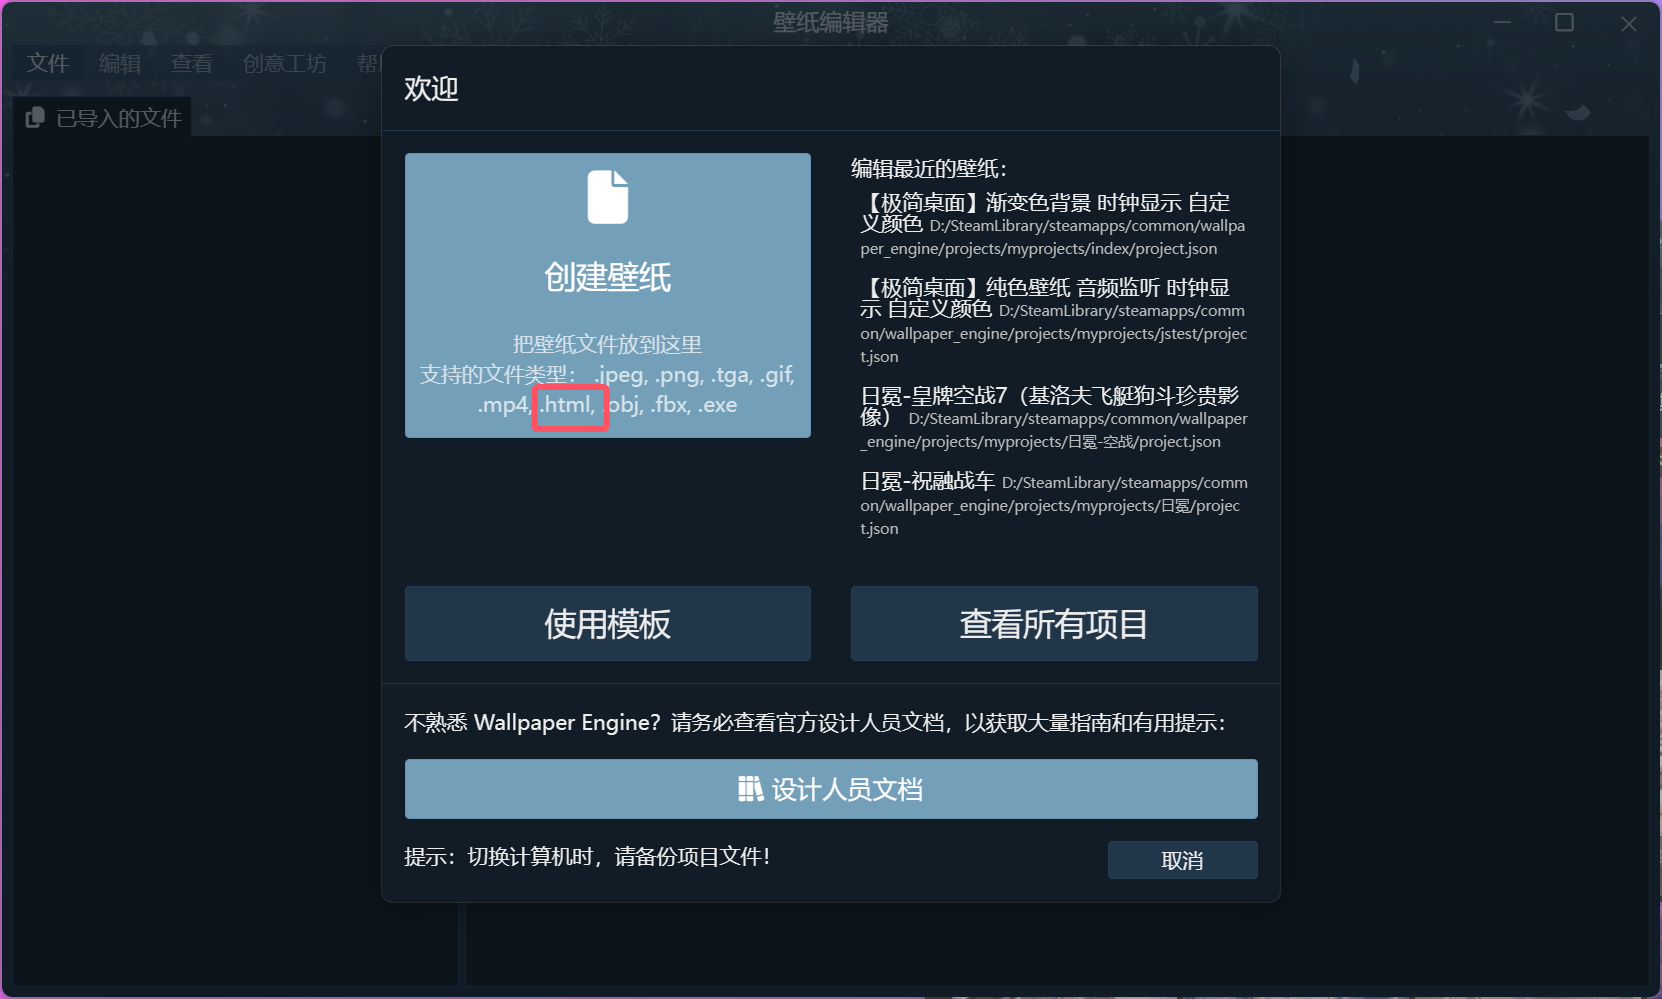
将项目根目录的index.html拖入wallpaper编辑器新建项目小窗即可,wallpaper将自动导入inedx.html同级目录的所有文件
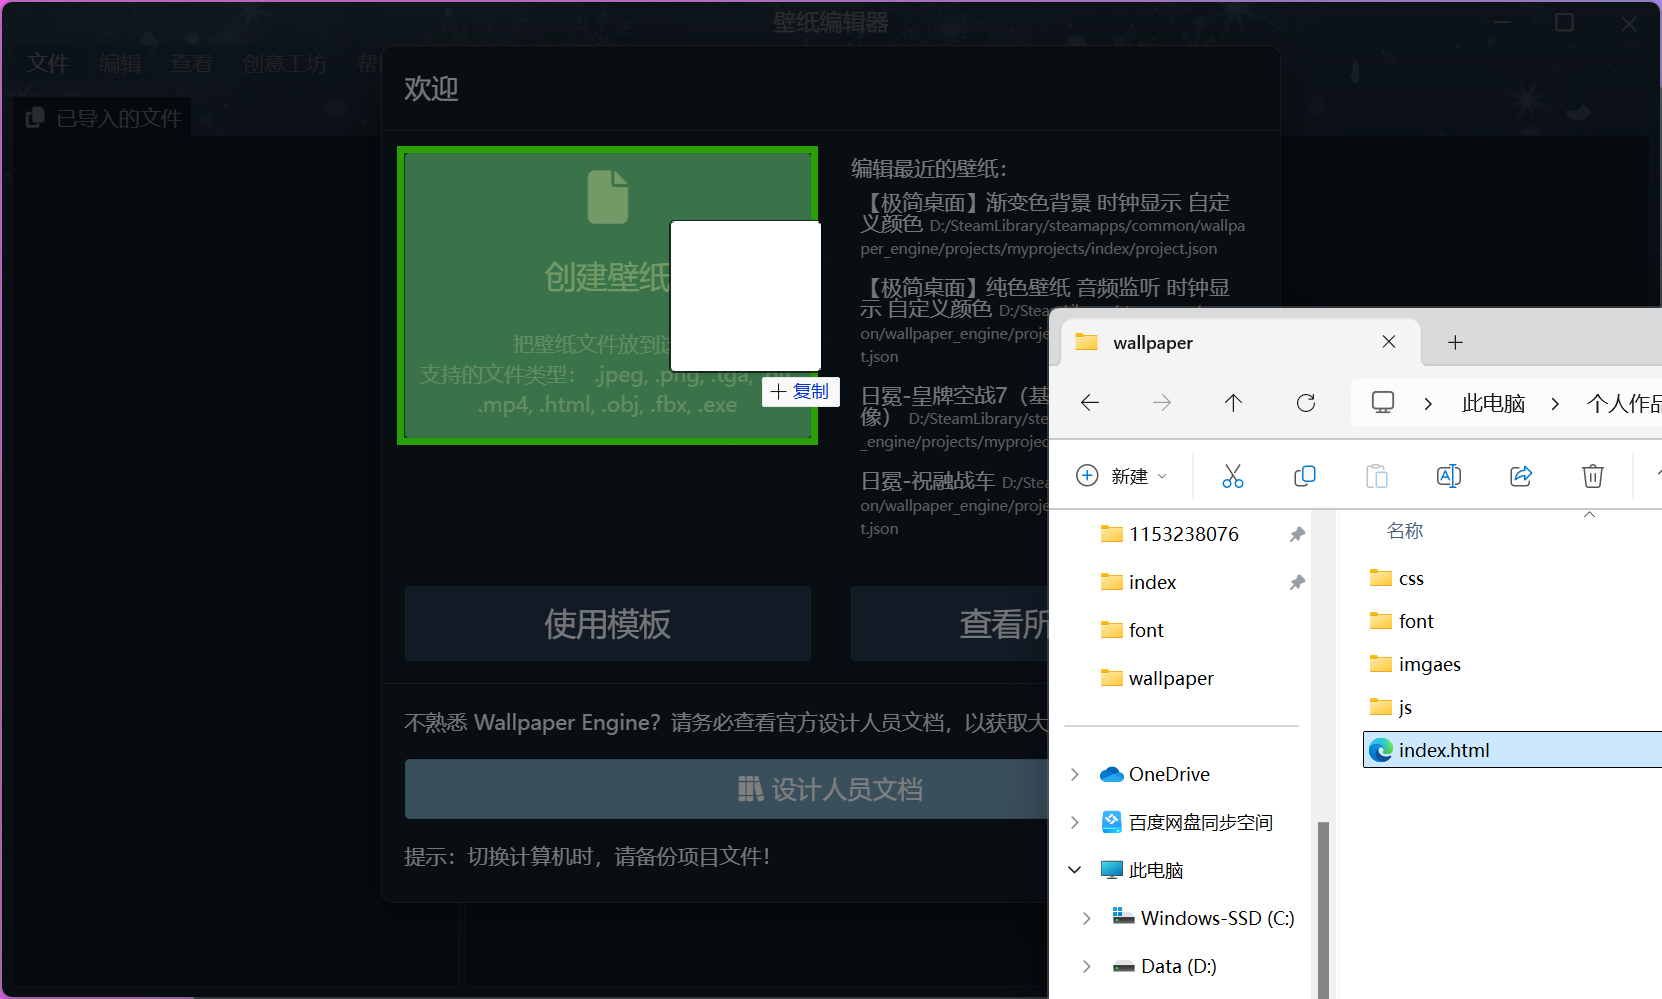
建议新建一个index.html文件导入后,直接进入导入后的目录进行开发工作,方便后续开发过程中的效果预览
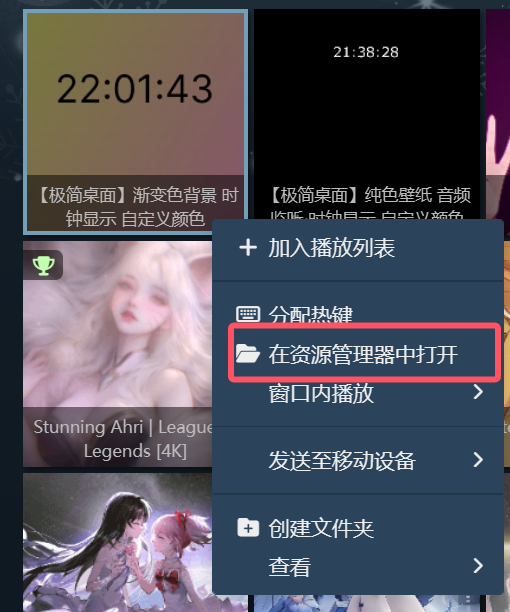
常规开发方式
项目制作完毕后,在浏览器运行没毛病后就可以直接导入wallpaper中,然后运行
”热“更新开发(不是实时预览)
浏览器端口运行
通过官方的浏览器服务可以在电脑浏览器中更方便的进行开发调试
浏览器开启wallpaper预览服务
转到wallpaper应用程序的设置中,在”常规“选项卡中将”CEF开发工具端口“填入”8080“(建议值,如果80口被占用,可以选择其他端口)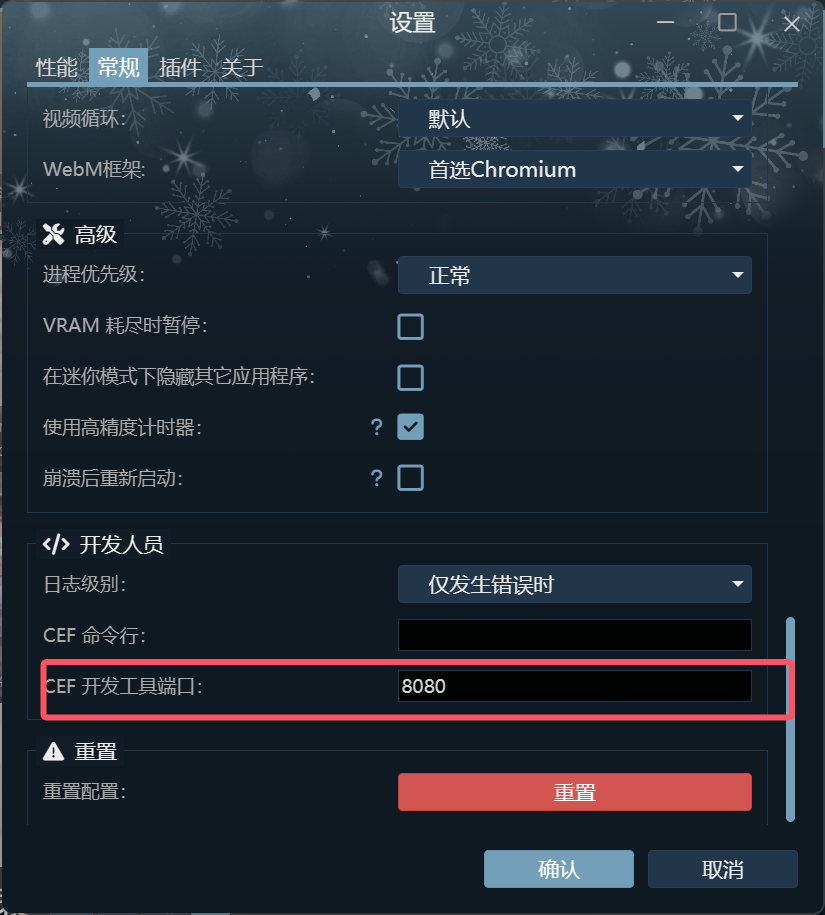
然后在浏览器地址栏输入网址:localhost:8080,即可找到wallpaper中使用网页技术开发的壁纸项目入口
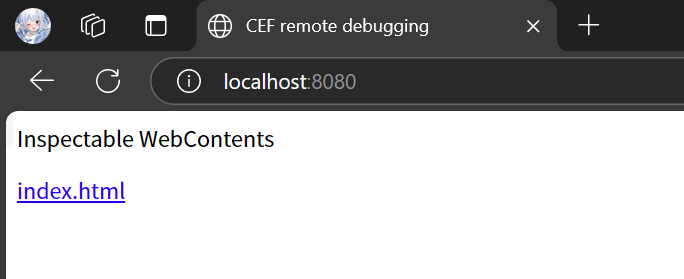
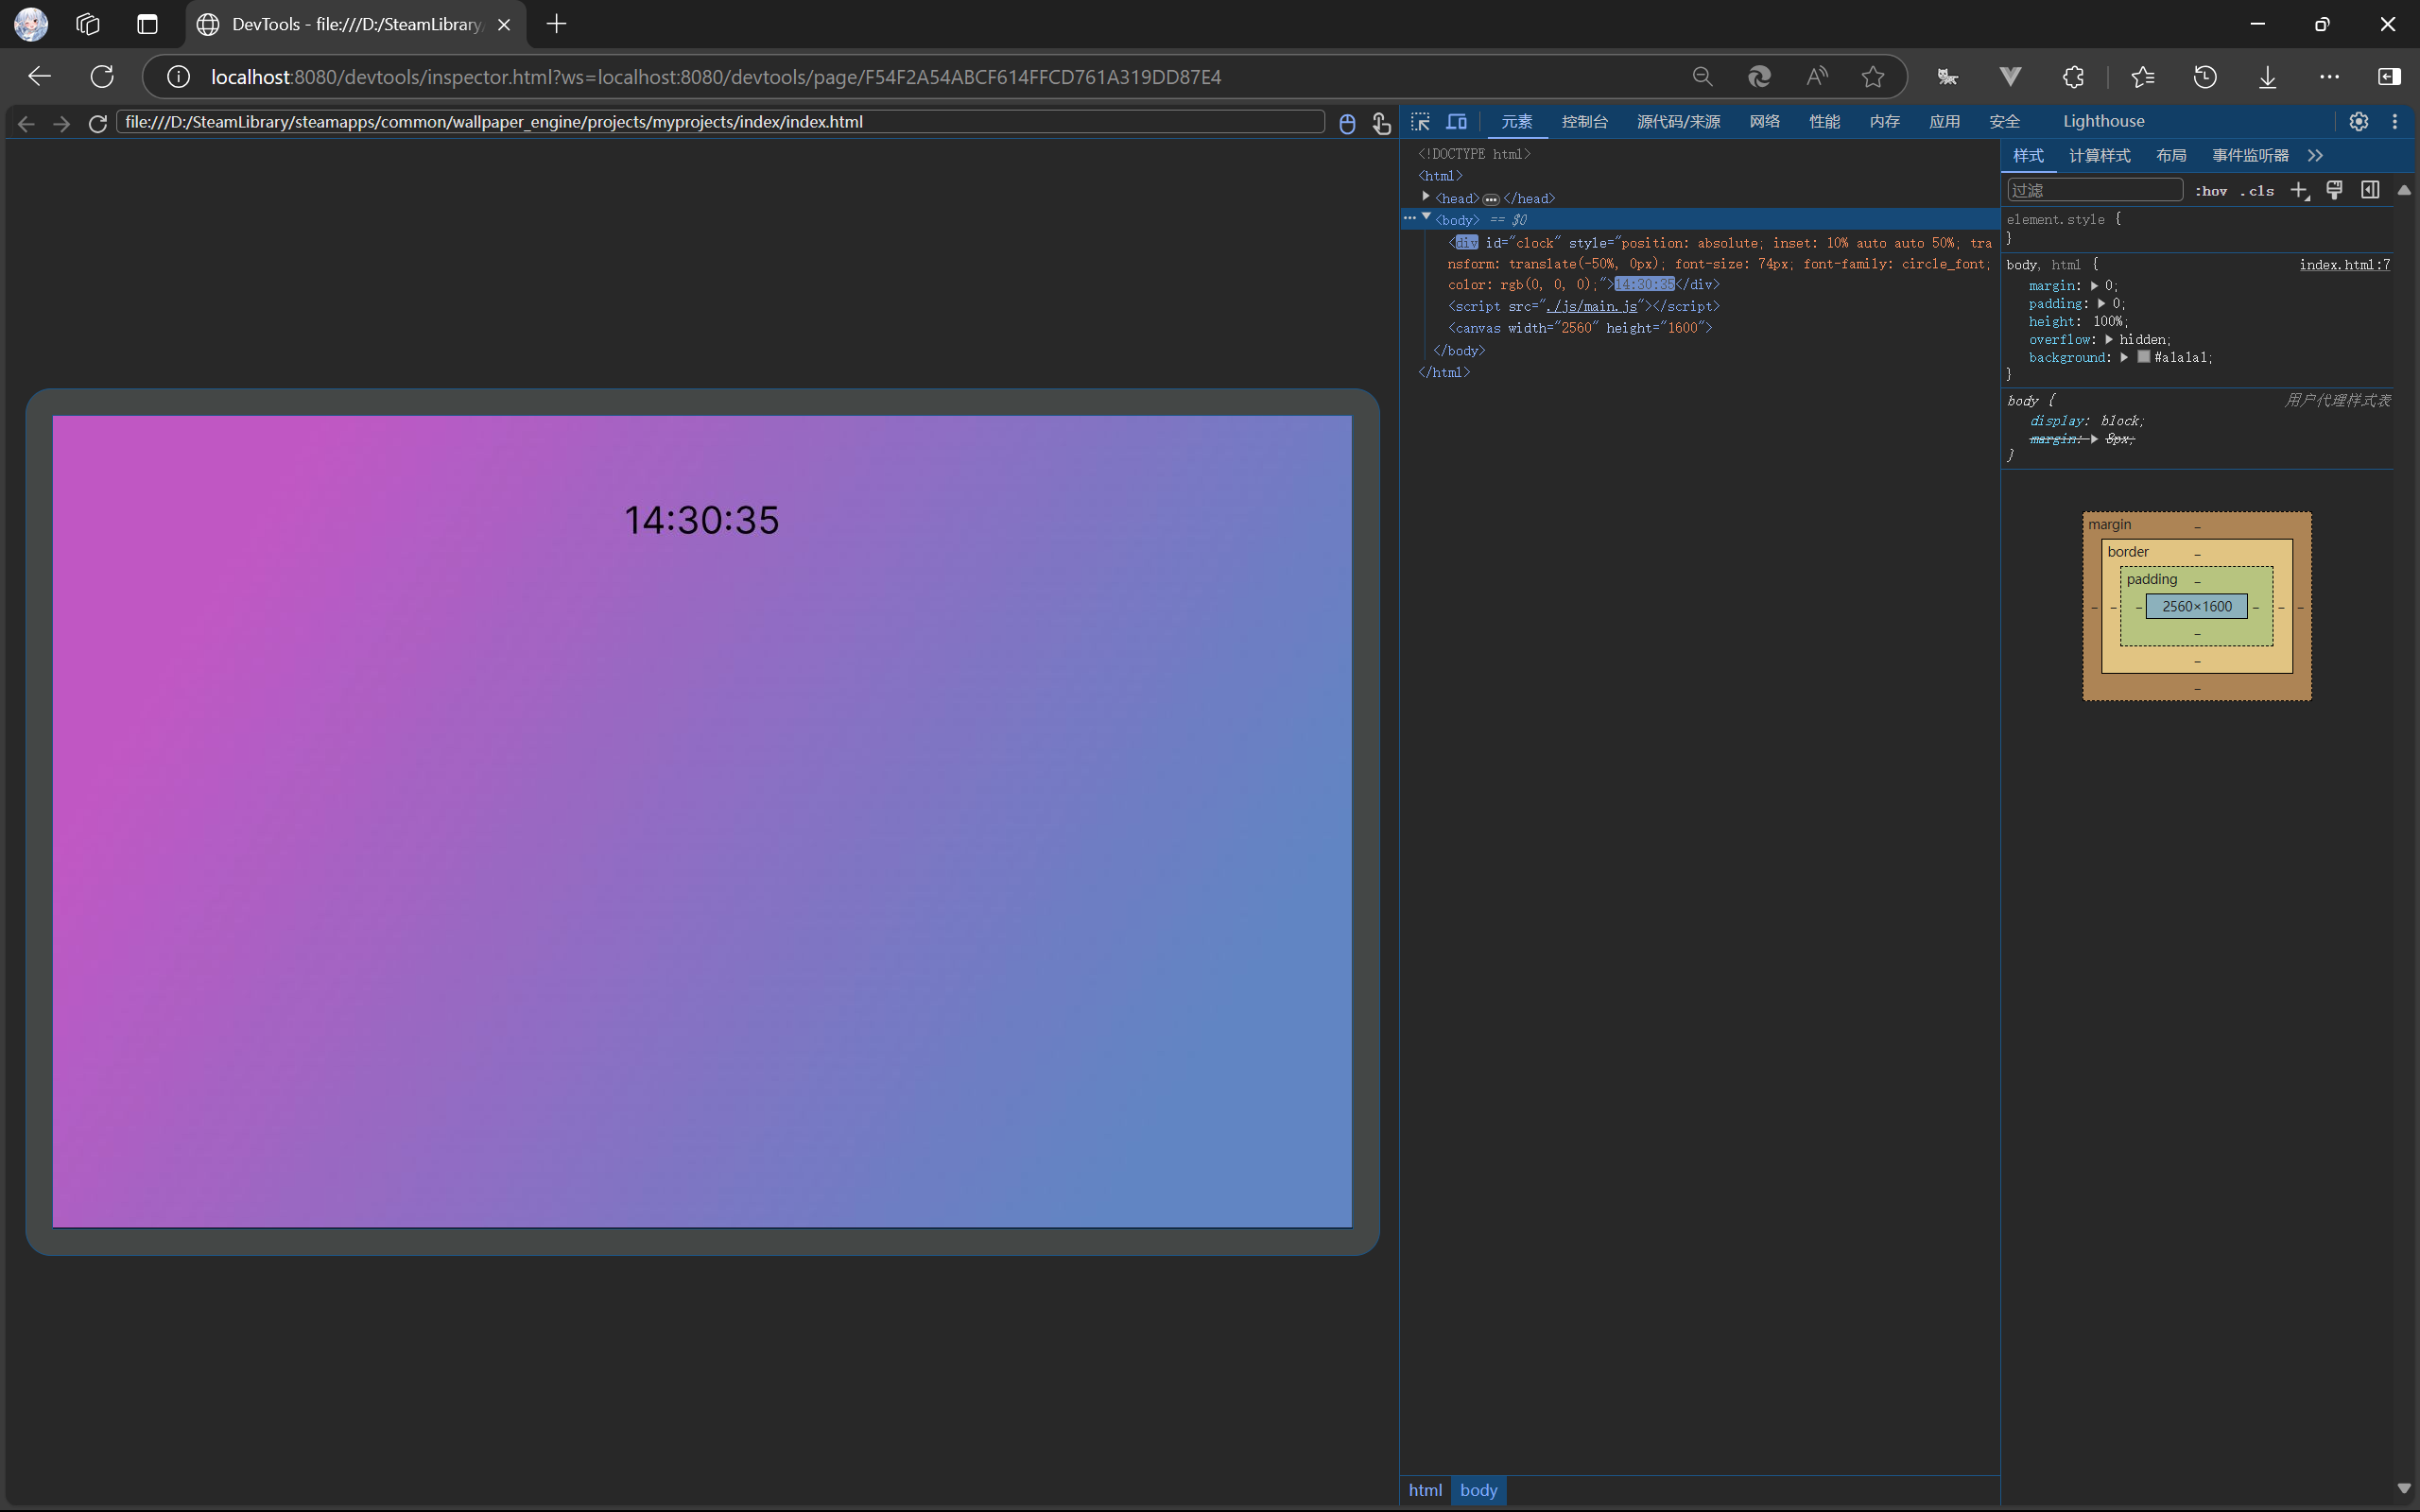
点进去之后默认开启一个开发者工具,但是这个开发者工具貌似有点老,但是足够使用了
第一次进入这个界面默认是英文,有调成中文的需求建议必应,这里就不细说了
在代码编辑器中作出更改后,在这里可以更方便的调试,比如脚本运行状态,以及一些数值的打印等开发调试操作。
当过多使用js制作壁纸使用了一些官方函数方法,强烈建议使用该服务进行开发。
电脑桌面预览效果
本文强烈建议在wallpaper项目目录下进行开发,便于效果预览
当进行壁纸内容更改后,通过切换壁纸进行壁纸重载,以达到效果更新预览
壁纸内容制作
HTML、CSS、JS遵循常规网页开发规则,语法格式使用规范方式即可。
需要注意的是,壁纸中的内容禁止出现网址链接显示的方式,比如图片的显示,要求将图片放进项目中,以及JS扩展脚本,也要以文件资源的形式放进项目中。
壁纸样式与wallpaper用户自定义属性
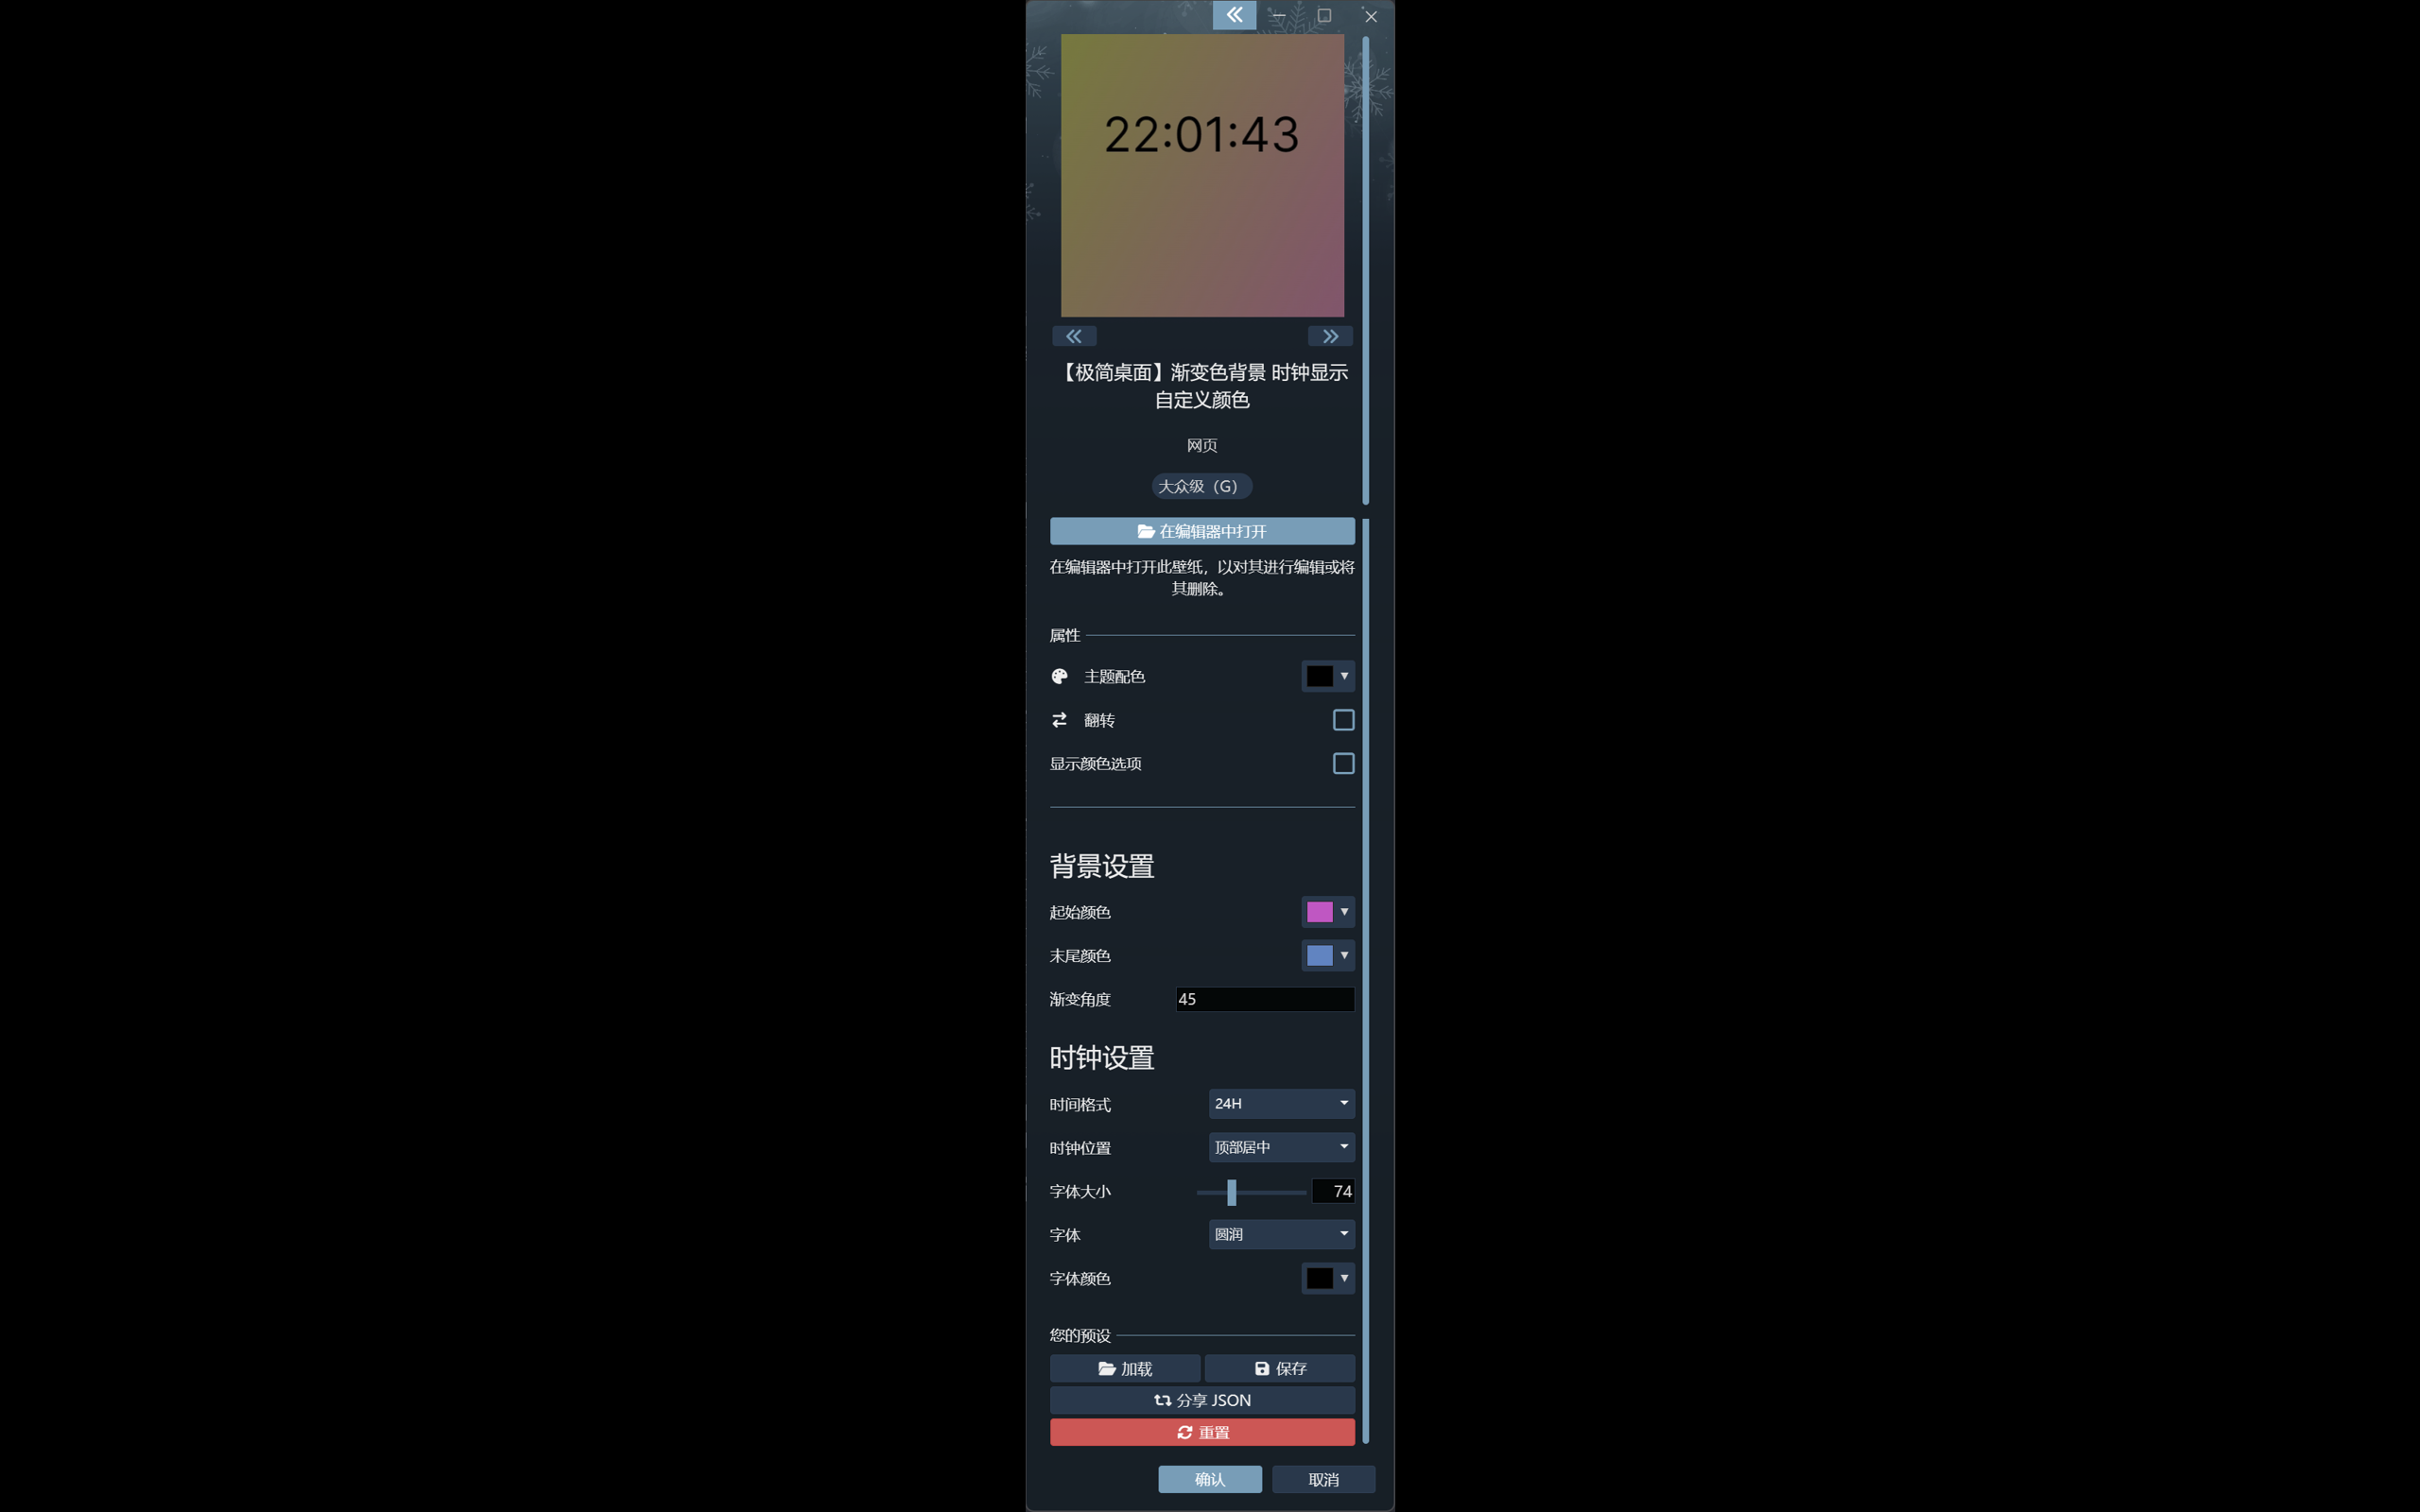
用户可以在这个地方对壁纸的一些属性进行自定义,与其相对应的有一个文件”porject.json“。

该文件将在wallpaper项目创建后(导入index.html后)自动生成。
配置文件示例
以下文件与以上用户属性图片中内容一致
{
    "contentrating" : "Everyone",//适用人群分类
    "description" : "Made in ShenYuan / 本壁纸由 深远 制作",//壁纸描述
    "file" : "index.html",
    "general" :
    {
        "properties" : //用户自定义属性控件
        {
            "background" : //空间ID
            {
                "index" : 0,//我也不知道这个有什么用,保持与order一致就好了
                "order" : 100,//控件顺序排序,建议从100开始
                "text" : "<h3>背景设置</h3>"//控件标题
            },
            "clock" :
            {
                "index" : 4,
                "order" : 104,
                "text" : "<h3>时钟设置</h3>"
            },
            "clock_font_color" :
            {
                "index" : 9,
                "order" : 109,
                "text" : "字体颜色",
                "type" : "color",//控件类型:color(色盘)、slider(步进数值选择滑块)、combo(下拉菜单)、textinput(文本输入框)、bool(开关)、text(不支持用户修改的文本显示控件)、file(选择文件[图像文件(.jpeg、.jpg、.png、.pnga、.bmp、.gif、.svg、.webp)视频文件(.webm、.ogg、.ogv)])
                "value" : "60 63 69"//默认值
            },
            "clock_font_size" :
            {
                "editable" : true,//是否允许用户通过输入框输入具体数值
                "index" : 7,
                "max" : 200,//最大值
                "min" : 20,//最小值
                "order" : 107,
                "text" : "字体大小",
                "type" : "slider",
                "value" : 50
            },
            "clock_fonts" :
            {
                "index" : 8,
                "options" : //下拉菜单选项
                [
                    {
                        "label" : "默认字体",
                        "value" : "default"
                    },
                    {
                        "label" : "圆润",
                        "value" : "circle_font"
                    },
                    {
                        "label" : "像素字",
                        "value" : "minecraft_font"
                    }
                ],
                "order" : 108,
                "text" : "字体",
                "type" : "combo",
                "value" : "default"
            },
            "clock_format" :
            {
                "index" : 5,
                "options" :
                [
                    {
                        "label" : "24H",
                        "value" : "24h"
                    },
                    {
                        "label" : "12H",
                        "value" : "12h"
                    }
                ],
                "order" : 105,
                "text" : "时间格式",
                "type" : "combo",
                "value" : "24h"
            },
            "clock_window_location" :
            {
                "index" : 6,
                "options" :
                [
                    {
                        "label" : "屏幕居中",
                        "value" : "center"
                    },
                    {
                        "label" : "顶部居中",
                        "value" : "top-center"
                    },
                    {
                        "label" : "底部居中",
                        "value" : "bottom-center"
                    },
                    {
                        "label" : "左侧居中",
                        "value" : "left-center"
                    },
                    {
                        "label" : "右侧居中",
                        "value" : "right-center"
                    }
                ],
                "order" : 106,
                "text" : "时钟位置",
                "type" : "combo",
                "value" : "center"
            },
            "end_color" :
            {
                "index" : 2,
                "order" : 102,
                "text" : "末尾颜色",
                "type" : "color",
                "value" : "60 63 69"
            },
            "gradient_angle" :
            {
                "index" : 3,
                "order" : 103,
                "text" : "渐变角度",
                "type" : "textinput",
                "value" : 0
            },
            "schemecolor" :
            {
                "order" : 0,
                "text" : "ui_browse_properties_scheme_color",
                "type" : "color",
                "value" : "0 0 0"
            },
            "start_color" :
            {
                "index" : 1,
                "order" : 101,
                "text" : "起始颜色",
                "type" : "color",
                "value" : "0.6 0.6 0.6"
            }
        }
    },
    "preview" : "preview.jpg",//预览图文件
    "ratingsex" : "none",
    "ratingviolence" : "none",
    "tags" : [ "Unspecified" ],//壁纸分类标签
    "title" : "【极简桌面】渐变色背景 时钟显示 自定义颜色",//壁纸标题
    "type" : "web",//壁纸类型
    "version" : 3,//壁纸版本
    "visibility" : "public",//壁纸对外状态
    "workshopid" : "3387864476",//壁纸id
    "workshopurl" : "steam://url/CommunityFilePage/3387864476"//壁纸链接
}
控件速查
色盘(color)
"keyword" :
  {
    "index" : 0,
    "order" : 100,
    "text" : "控件标题",
    "type" : "color",
    "value" : "60 63 69"
  }
文本输入框(textinput)
"keyword" :
  {
    "index" : 0,
    "order" : 100,
    "text" : "控件标题",
    "type" : "textinput",
    "value" : " "
  }
步进滑块(slider)
"keyword" :
  {
    "editable" : true,
    "index" : 0,
    "max" : 100,
    "min" : 1,
    "order" : 100,
    "text" : "控件标题",
    "type" : "slider",
    "value" : 50
  }
开关(bool)
"keyword" :
  {
    "index" : 0,
    "order" : 100,
    "text" : "控件标题",
    "type" : "bool",
    "value" : "60 63 69"
  }
下拉菜单(combo)
"keyword" :
  {
    "index" : 0,
    "order" : 100,
    "text" : "控件标题",
    "type" : "combo",
    "value" : "true"
  }
选择文件(file)
"keyword" :
  {
    "index" : 0,
    "order" : 100,
    "text" : "控件标题",
    "type" : "file"
  }
目录选择(directory)
"keyword" :
  {
    "index" : 0,
    "order" : 100,
    "text" : "控件标题",
    "mode" : "mode",//ondemand和fetchall两种模式
    "type" : "directory"
  }
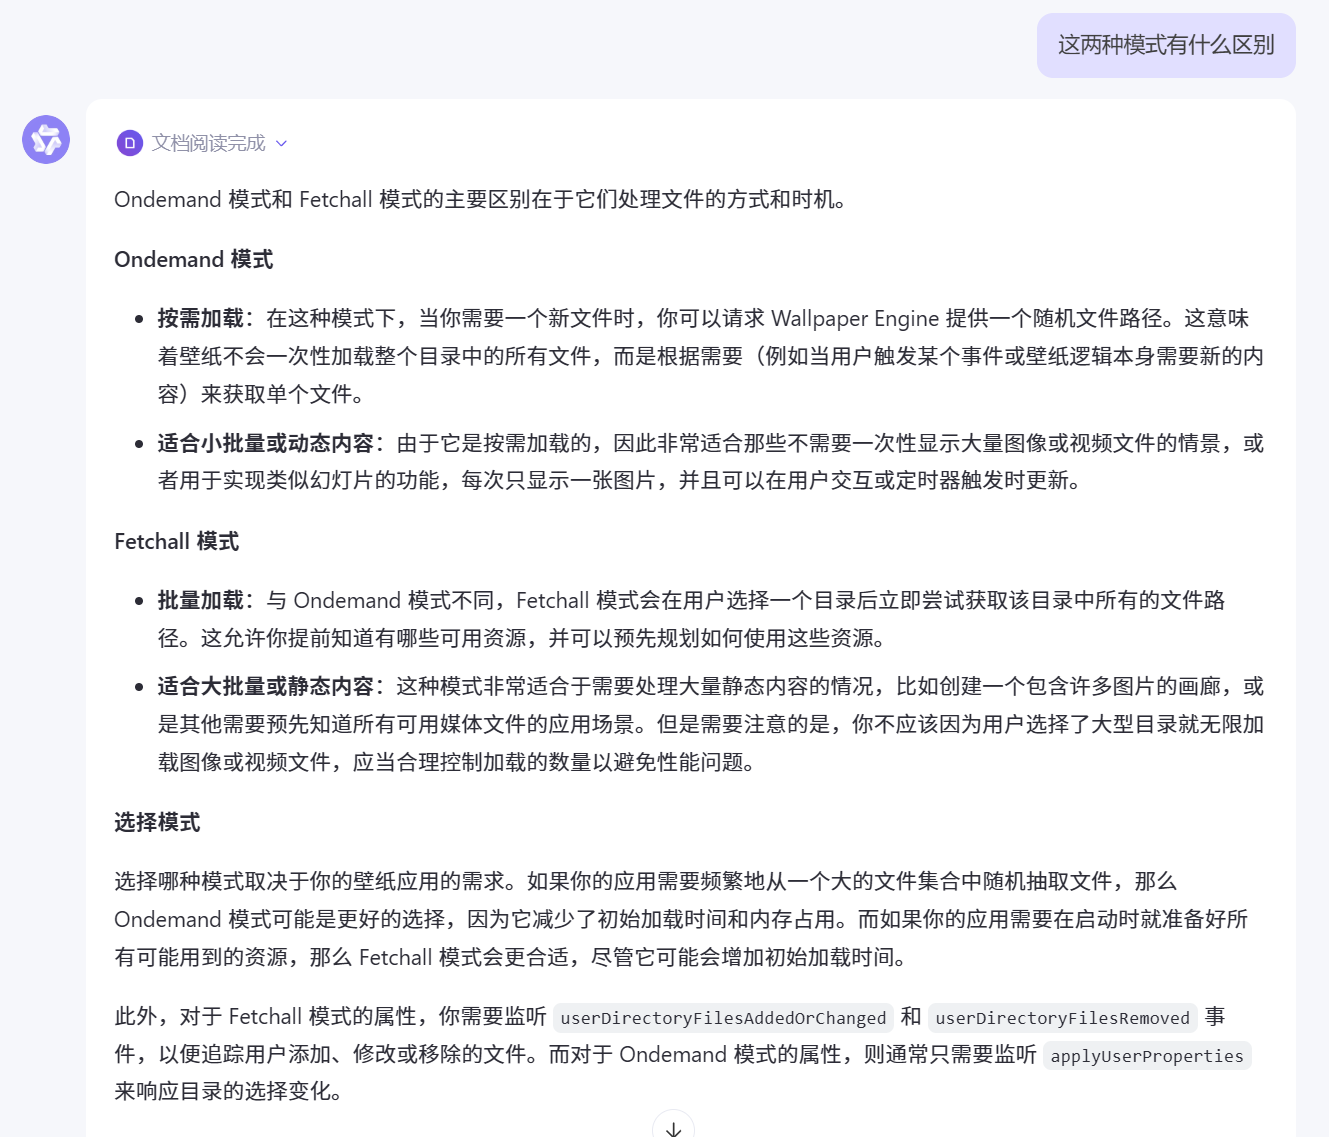
对于directory控件中两种模式的解释,参照下图
控件与壁纸JS脚本间传参
window.wallpaperPropertyListener = { //注册配置监听器
    applyUserProperties: function(properties) {
        if (properties.yourproperty) {
            // Do something with yourproperty
            //一般在这将读取到的值赋予全局某个变量
        }
        if (properties.anotherproperty) {
            // Do something with anotherproperty
        }
        // Add more properties here
    },
};
关于控件与其对应的取值方法参见User Properties | Wallpaper Engine - Designer Documentation
色盘(color)
if (properties.customcolor) {
     // Convert the custom color to 0 - 255 range for CSS usage
     var customColor = properties.customcolor.value.split(' ');
     customColor = customColor.map(function(c) {
         return Math.ceil(c * 255);
    });
    var customColorAsCSS = 'rgb(' + customColor + ')';
    // Do something useful with the value here or assign it to a global variable
}
文本输入框(textinput)
if (properties.customtext) {
    var mySliderValue = properties.customtext.value;
    // Do something useful with the value here or assign it to a global variable
}
步进滑块(slider)
if (properties.customslider) {
    var mySliderValue = properties.customslider.value;
    // Do something useful with the value here or assign it to a global variable
}
开关(bool)
if (properties.customcheckbox) {
    var mySliderValue = properties.customcheckbox.value;
    // Do something useful with the value here or assign it to a global variable
}
下拉菜单(combo)
if (properties.customcombo) {
    var mySliderValue = properties.customcombo.value;
    // Do something useful with the value here or assign it to a global variable
}
选择文件(file)
if (properties.customimage) {
    // Read the file
    var customImageFile = 'file:///' + properties.customimage.value;
}
目录选择(directory)
ondemand模式
if (properties.customrandomdirectory) {
    //customrandomdirectory 配置ID
    if (properties.customrandomdirectory.value) {
        // Directory set
    } else {
        // No directory set
    }
}
以下函数可以快速帮你制作一个随机壁纸展示
function randomImageResponse(propertyName, filePath) {
    imageElement = document.getElementById('UserImage');
    imageElement.src = 'file:///' + filePath;
    //这只是个示例,如果需要将文件路径单独作为全局变量,转换一下赋值即可
    //propertyName 配置ID
}

window.wallpaperRequestRandomFileForProperty('customrandomdirectory', randomImageResponse);
fetchall模式
该模式使用另外两个专属函数来监听用户属性的更改,不再依赖以下函数
applyUserProperties: function() { }
将使用以下两个函数进行配置变更监听
window.wallpaperPropertyListener = {
    userDirectoryFilesAddedOrChanged: function(propertyName, changedFiles) {
        // propertyName 是配置文件的配置ID
        // changedFiles 是改变的路径
    },
    userDirectoryFilesRemoved: function(propertyName, removedFiles) {
         // propertyName 是配置文件的配置ID
        // removedFiles 是改变的路径
    }
};
发布壁纸
在WallPaper编辑器中检查相关文件是否以被导入,无关文件是否已被移除,然后正常流程发布即可。
再次提醒,项目内不要使用任何网络资源,强烈建议使用本地资源(项目根目录存储)
